


Views: 0 Author: Site Editor Publish Time: 2026-10-22 Origin: Site


Transitioning electrical equipment from procurement to active deployment represents a critical phase for any facility. The operational lifespan and safety profile of your electrical infrastructure are strictly dictated by the accuracy of this initial setup. You must treat this process seriously to ensure long-term reliability.
Poor installation practices often lead to catastrophic failures like arc flashes. They also trigger severe non-compliance penalties and cause expensive facility downtime. You cannot afford to treat this deployment as a simple plug-and-play exercise. Improper handling directly jeopardizes both personnel and critical operational continuity.
We will outline the standardized installation method and critical safety precautions you must follow. You will learn actionable steps to mitigate common deployment risks. Furthermore, we will explore how installation complexities should directly influence your final vendor evaluation and shortlisting process.
Preparation is decisive: Foundation leveling, load capacity, and clearance planning eliminate 80% of deployment delays.
Strict adherence to method: Sequential installation—from anchoring to primary wiring and torque verification—ensures structural and electrical integrity.
Non-negotiable precautions: Grounding continuity, thermal management, and arc flash boundary compliance are critical for facility safety.
Vendor evaluation impacts deployment: Procurement should prioritize cabinets offering modular designs, clear factory acceptance testing (FAT), and comprehensive installation documentation.
You must establish strict prerequisites before moving any equipment. Effective site evaluation prevents expensive retrofits and delays later in the project. Planners should address environmental constraints, footprint limits, and safety standards.
First, verify the IP or NEMA rating matches the site environment. A NEMA 1 enclosure will fail in a dusty or moist industrial space. You need higher ratings to block corrosive elements and heavy moisture. Confirm structural weight-bearing limits for your floor. Concrete pads and raised floors must support the heavy static load safely. Failure to calculate load capacities often results in cracked foundations.
You must adhere to strict working space requirements for front and rear access. National Electrical Code (NEC) and IEC standards dictate these boundaries. You usually need at least three to four feet of clearance. This space protects maintenance personnel during routine inspections. You must also account for door swing allowances. Technicians require unhindered emergency egress routes at all times.
Match your factory schematics against actual site single-line diagrams (SLD). This step confirms the system logic aligns with facility realities. Next, establish rigorous lockout/tagout (LOTO) procedures. You must finalize these protocols before any physical integration begins. Below are key checkpoints you should verify:
Verify main breaker ratings against the facility feed.
Ensure grounding grids are accessible and tested.
Confirm HVAC systems can handle the expected heat load.
Audit the delivery path for height and width restrictions.
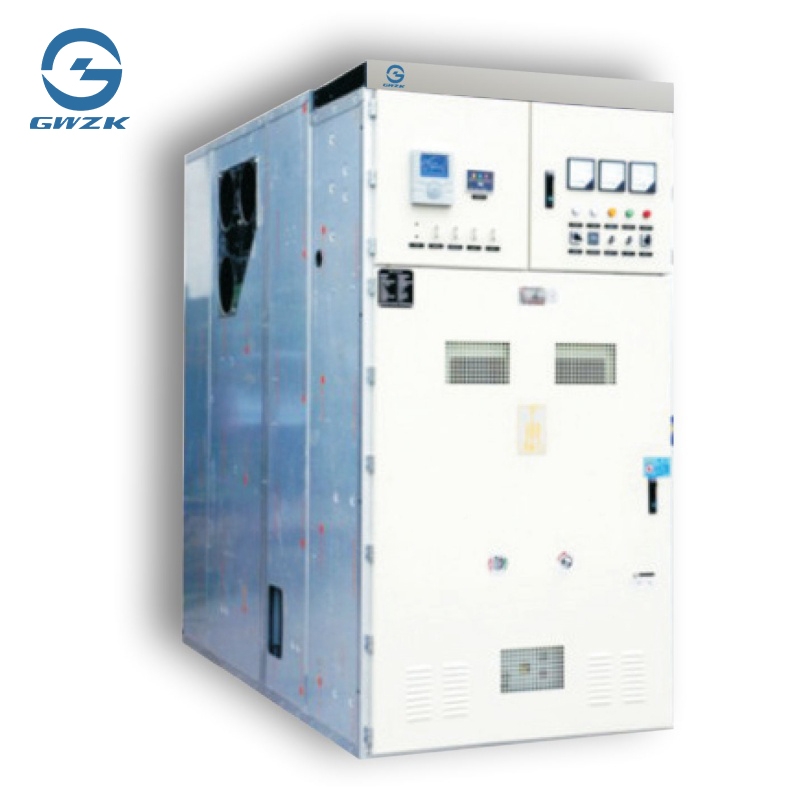
Proper execution demands procedural expertise. A meticulous approach guarantees both structural stability and electrical safety. Follow these sequential phases to install a Distribution Cabinet correctly.
Always follow strict rigging protocols during uncrating. Use designated lifting eyes provided by the manufacturer. Never place stress on doors or pre-installed internal switchgear. Improper lifting warps the frame and misaligns internal components.
Next, focus on leveling the foundation. You must maintain tight tolerances for cabinet alignment. A perfectly level base ensures proper door sealing and accurate busbar alignment. Even minor deviations can create mechanical stress over time.
Fasten the cabinet securely to the foundation. Use specified anchor bolts and heavy-duty vibration-dampening pads. These pads protect sensitive relays from ambient facility vibrations. When joining modular or multi-section units, align the cross-bus connections perfectly. Ensure tight mechanical coupling between all sections. Gaps in the assembly compromise the enclosure's environmental rating.
Determine your cable entry preparation strategy early. Whether using top or bottom entry, you must install gland plates. Gland plates maintain the enclosure's specific IP ratings. Follow these wiring steps carefully:
Prepare primary main electrical box connections according to the SLD.
Verify phase sequencing before terminating heavy-gauge cables.
Observe strict bending radii limits to avoid damaging cable insulation.
Integrate secondary and control wiring using designated raceways.
Avoid crossing high-voltage cables over low-voltage control lines. This separation prevents induced noise and signal interference.
Mechanical tightness dictates electrical safety. You must utilize calibrated torque wrenches for all connections. Meet the exact manufacturer specifications for busbars and terminals. Over-tightening strips threads, while under-tightening creates resistance. High resistance leads directly to thermal hotspots and potential fires. Mark each torqued bolt using a torque-indicating pen for visual confirmation.
A compliant installation requires standard-aware thinking. You must integrate specific precautions to protect your Distribution Cabinet and your workforce. Mitigating these risks builds a trustworthy electrical infrastructure.
Ensure continuous earth connections across all components. You must bond cabinet panels, doors, and internal frames together. Connect this entire assembly to the main facility ground grid. Finally, test the ground resistance using a specialized meter. The resistance must meet local jurisdictional limits. Most safety standards require a resistance of less than 1 to 5 ohms.
Maintain strict separation of low-voltage control wires from high-voltage power cables. Physical distance prevents dangerous electromagnetic interference (EMI). EMI can cause sensitive protective relays to trip spuriously. Additionally, verify your phase sequencing (L1, L2, L3) meticulously. You must confirm this sequence before making any load connections to avoid reverse-motor rotation.
You must clean the interior thoroughly prior to energization. Vacuuming is an absolute necessity. Never use compressed air to blow out dust. Blowing merely pushes metal shavings and conductive debris deeper into circuit breakers. Remove all stripped insulation, dropped hardware, and wire clippings. Conductive FOD causes immediate short circuits upon power-up.
Installation Risk Mitigation Matrix
Identified Risk | Root Cause | Required Mitigation Action |
|---|---|---|
Thermal Hotspots | Improperly torqued busbar bolts | Use calibrated wrenches; apply torque-marking paste. |
Electromagnetic Interference | Mixed high/low voltage wiring | Enforce strict physical segregation in cable raceways. |
Arc Flash on Startup | Conductive debris left inside | Perform strict vacuum-only FOD elimination procedures. |
Enclosure Ingress | Missing or unsealed gland plates | Install NEMA/IP rated glands for all cable entries. |
Evidence-oriented verification proves your installation is ready. Never skip commissioning protocols. Proper testing catches invisible errors before they cause catastrophic damage.
Begin with comprehensive cold testing. Perform insulation resistance testing, commonly known as Megger testing. This test detects microscopic cable damage caused during the pulling phase. Next, conduct thorough mechanical checks. Practice racking circuit breakers in and out of their chassis. Verify that all mechanical interlock functionalities operate smoothly. You should resolve any physical binding or resistance immediately.
Only proceed to live commissioning after passing all cold tests. Follow a strict, step-by-step energization sequence. Do not close all breakers at once. Apply thermal imaging using an infrared scanner under the initial load. Infrared scanning quickly identifies loose connections or improper crimps. Finally, complete all handover documentation. Finalize the ongoing maintenance schedule with the facility management team.
Procurement decisions directly impact installation difficulty. Facility leaders should evaluate vendors based on deployment friction. The design of your chosen Distribution Cabinet plays a massive role in labor efficiency.
Cheaper hardware often disguises inflated installation labor costs. Complex, poorly engineered frames require custom on-site modifications. This extra labor extends facility downtime significantly during installation. A cumbersome design forces technicians to spend hours modifying busbars or cutting custom entry points.
Look for features that streamline field integration. Factory-prewired and pre-tested configurations drastically reduce on-site labor. Modular busbar systems allow for rapid, error-free joining of multiple sections. Removable gland plates simplify heavy cable routing. You also need comprehensive, easy-to-read schematic documentation. Responsive technical support from the manufacturer resolves on-site queries instantly.
You can identify reliable vendors through specific trust signals. Look for manufacturers who provide transparent Factory Acceptance Testing (FAT) reports. A rigorous FAT process catches assembly errors before the unit ships. Insist on detailed Installation, Operation, and Maintenance (IOM) manuals. Finally, confirm the availability of post-sales commissioning support. Vendors who stand by their equipment accelerate your operational readiness.
Safe and compliant installation requires rigorous site preparation and methodical execution. You must follow structural anchoring rules and adhere to strict torque specifications. Stringent post-installation testing ensures your facility avoids dangerous electrical failures. Preparation eliminates the vast majority of deployment hurdles.
We advise decision-makers to audit their shortlisted vendors holistically. Do not judge based solely on unit price. Evaluate the deployment support, modularity, and compliance documentation they provide. Smooth installation hinges on excellent factory engineering.
Contact our engineering team today. We offer expert consultations on selecting and deploying equipment tailored to your facility's exact load requirements and safety standards.
A: You must follow NEC and IEC working space rules. Typically, you need 3 to 4 feet of clearance in front of the equipment. The exact distance depends on the system voltage. This space allows personnel to perform safe maintenance and provides an unobstructed emergency exit path.
A: You should avoid installing it directly on raw concrete. We recommend using leveling channels, steel plinths, and vibration pads. These additions prevent moisture ingress from the floor. They also protect sensitive internal components from mechanical stress and facility vibrations.
A: You should perform post-installation thermal scanning under load to verify initial torque. Afterward, standard preventative maintenance dictates checking connections annually. Thermal cycling causes metal expansion and contraction, which naturally loosens bolts over time. Regular verification prevents dangerous thermal hotspots.


